

How To Take Photo In Mirror Without Camera

How to Mirror an Image in Photoshop
Learn how to create a archetype mirror prototype effect in Photoshop with this easy step-by-step tutorial for Photoshop CC 2020 and earlier!
In this tutorial, I prove y'all how like shooting fish in a barrel it is to mirror an epitome in Photoshop past flipping one side of your photo to create its own mirror reflection. This popular event is often used in album covers and flick posters, and information technology'due south a simple and fun way to create interesting, symmetrical designs from virtually any image!
I'll exist using Photoshop CC 2020 merely this tutorial is fully uniform with any contempo version of Photoshop.
Hither's an example of what the final mirror image effect will look when we're done:
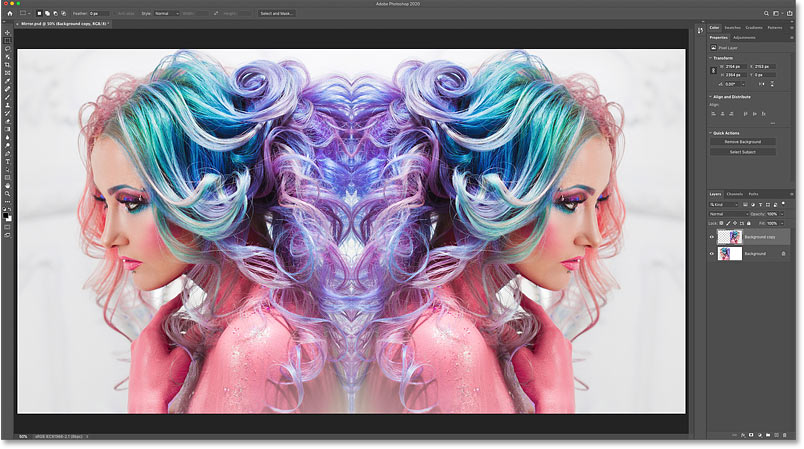
The mirror epitome upshot.
Permit's get started!
Footstep i: Open up your image
Start by opening your image into Photoshop. I'll employ this image from Adobe Stock:
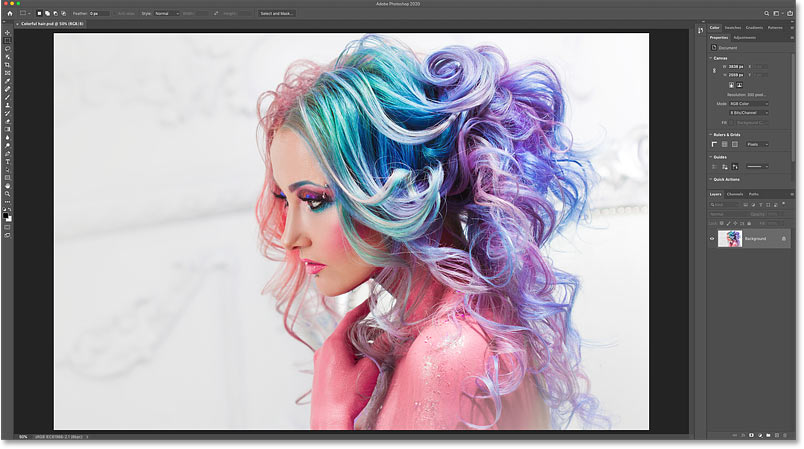
The original photo. Credit: Adobe Stock.
For help with opening images, see my Getting Images into Photoshop complete guide.
Step 2: Duplicate the document
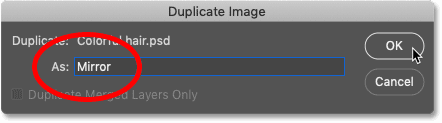
Earlier nosotros mirror the image, permit's make a copy of our Photoshop certificate. That mode, nosotros won't accidentally salve the mirrored version over the original.
Go upwardly to the Paradigm menu in the Carte du jour Bar forth the top of the screen and choose Duplicate:
Going to Epitome > Indistinguishable.
Then in the Duplicate Image dialog box, name the copy "Mirror" and click OK:
Naming the copy of the document.
And if we await at the document tabs just below the Options Bar, we see that nosotros're now working on a re-create of the prototype named "Mirror":

The document tabs.
You lot can close the original document by clicking the small "10" in its tab. On a Windows PC, the "10" is found on the right side of the tab, and on a Mac, information technology'due south on the left:

Closing the original document.
Footstep three: Select the Ingather Tool
Next, select the Crop Tool from the toolbar:
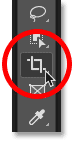
Selecting the Crop Tool.
Step 4: Set up the aspect ratio to Ratio
And in the Options Bar, brand sure that the Crop Tool'due south Attribute Ratio is set to Ratio. This volition let usa freely accommodate the sides of the cropping edge:
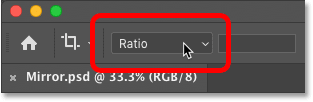
Setting the aspect ratio to Ratio.
Step five: Drag one side of the cropping edge to the flip point
Depending on which direction your epitome needs to flip, click on the left or right side of the cropping border and elevate it over to the spot where the image will be mirrored.
In my example, I want to flip the prototype from left to right using the woman's hair as the mirror point. So I'll drag the right side of the cropping border to that location:
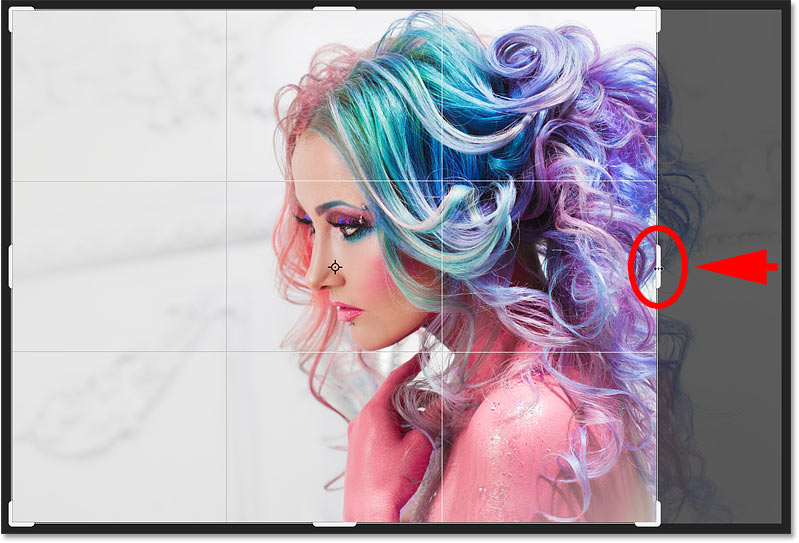
Dragging the right side of the cropping border to the flip point of the paradigm.
Step 6: Drag the reverse side to crop away unwanted space
I also don't need all of that empty space on the left of the image. And so to ingather some of it away, I'll drag the left side of the cropping border inward:
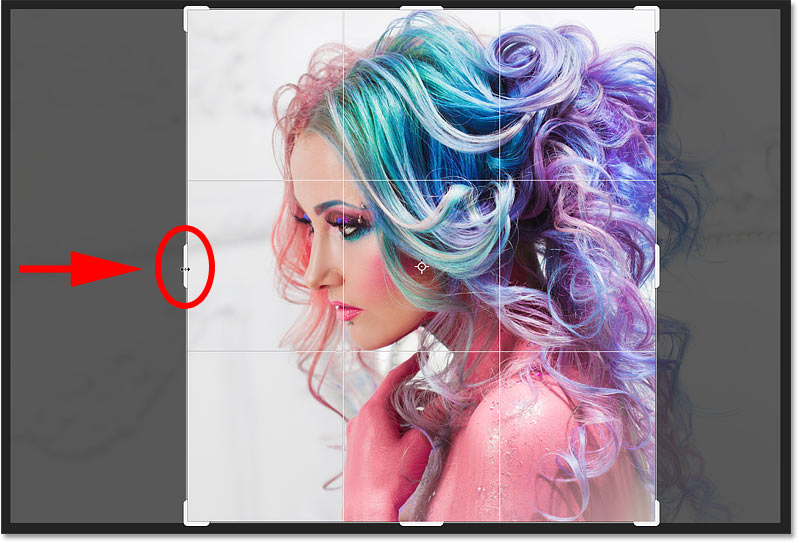
Dragging the left side of the cropping border to crop away the unwanted area.
Step vii: Turn on "Delete Cropped Pixels"
Earlier yous ingather the prototype, go up to the Options Bar and make sure Delete Cropped Pixels is checked:
The Delete Cropped Pixels option.
Step 8: Crop the epitome
And so withal in the Options Bar, crop the image past clicking the checkmark:
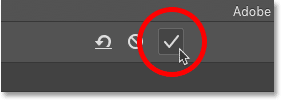
Clicking the checkmark.
And here'south my event after cropping the photo:
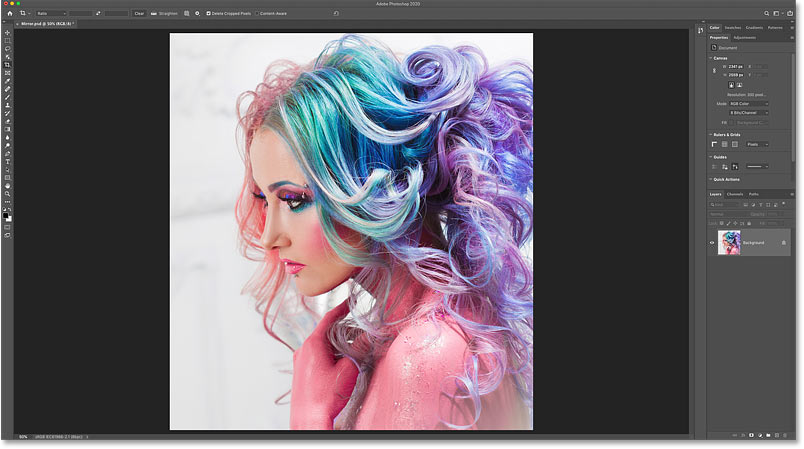
The cropped version of the image.
Related: Photoshop'south Crop Tool tips and tricks!
Step 9: Duplicate the Background layer
In the Layers panel, the image sits on the Background layer.
Make a copy of the Background layer by dragging it down onto the Add together New Layer icon:
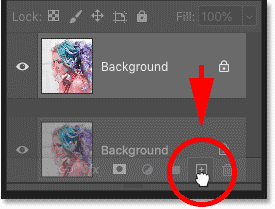
Duplicating the Background layer.
The copy appears above the original:
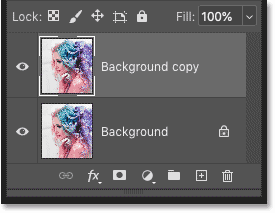
The "Groundwork re-create" layer.
Step 10: Select the Free Transform control
With the "Background copy" layer selected, become up to the Edit menu in the Carte Bar and cull Complimentary Transform. Or press Ctrl+T (Win) / Command+T (Mac) on your keyboard:
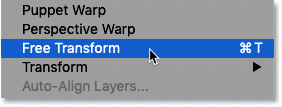
Going to Edit > Free Transform.
Step 11: Drag the reference point onto the side handle
Photoshop's Free Transform box and handles appear around the prototype.
And in the center of the transform box is a target icon known every bit the reference signal. This signal marks the center of the transformation:

The reference betoken in the center of the Free Transform box.
How to testify the reference point
If you lot are using a newer version of Photoshop and the reference point is missing, go upward to the Options Bar and click within the Toggle Reference Betoken checkbox:
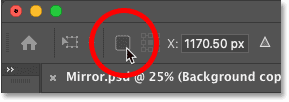
The Toggle Reference Point checkbox.
Then click on the reference point and drag information technology onto the handle on the side where the image will flip.
Since my prototype is going to flip from left to right, I'll drag the reference point onto the right side handle:
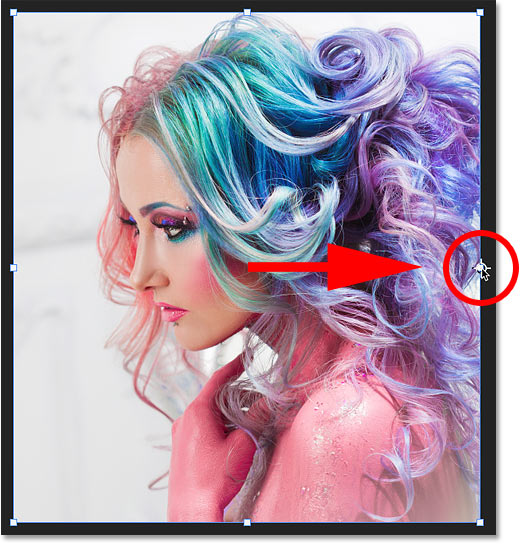
Dragging the reference indicate onto the side handle.
Step 12: Cull the Flip Horizontal control
Then with the Complimentary Transform control nonetheless agile, right-click (Win) / Control-click anywhere inside the image and choose Flip Horizontal from the menu:
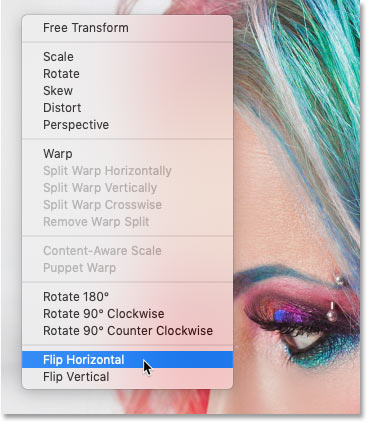
Choosing the Flip Horizontal command.
It won't look like the image has flipped. Instead, the Free Transform box will move to the empty area beside the image:
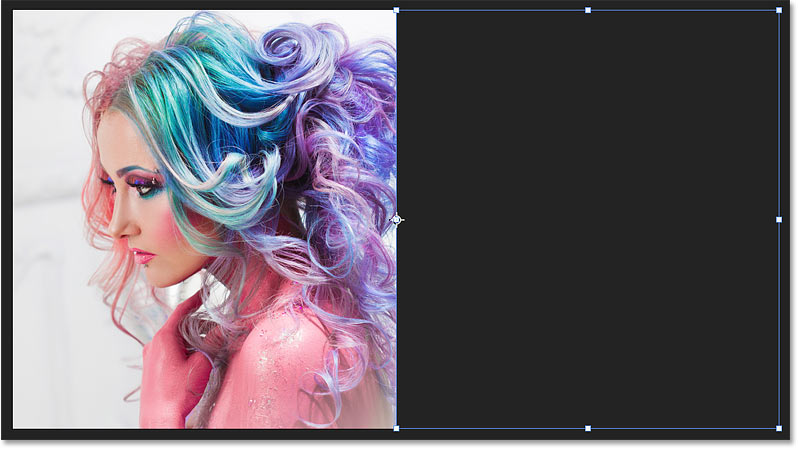
The event after flipping the paradigm horizontally.
Stride 13: Accept and close Free Transform
Commit the transformation and close Free Transform by clicking the checkmark in the Options Bar:

Clicking the checkmark.
Step 14: Select the Reveal All command
If the cropping border is still visible around your image, it's because the Crop Tool is however active. Printing the letter M on your keyboard to quickly switch to the Rectangular Marquee Tool to remove the border.
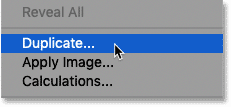
At this point, we've created the mirrored version of the image, but we can't meet it because the mirrored one-half is sitting off to the side. So here'southward the fun part. To view the unabridged consequence, go up to the Image menu in the Carte Bar and cull Reveal All:
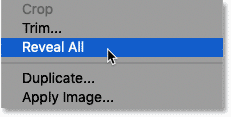
Going to Prototype > Reveal All.
The Reveal All command instantly reveals the entire Photoshop sail, including the subconscious areas, giving us our final result.
To fit the entire effect on the screen, choose the Fit on Screen control by pressing Ctrl+0 (Win) / Command+0 (Mac) on your keyboard:
The last mirror paradigm effect.
And there nosotros have information technology! That'due south how to mirror an image with Photoshop!
Now take your mirroring skills to the next level with my Flip, Mirror and Rotate Images tutorial that shows you how to make more than complex symmetrical designs!
Visit our Photo Effects section for more tutorials. And don't forget, all of our Photoshop tutorials are available to download as PDFs!
Other Stuff
© 2022 Photoshop Essentials.com.
For inspiration, not duplication.
Site design by Steve Patterson.
Photoshop is a trademark of Adobe Systems Inc.

Source: https://www.photoshopessentials.com/photo-effects/mirror-image-effect-with-photoshop/
Posted by: koppbuourproy43.blogspot.com
0 Response to "How To Take Photo In Mirror Without Camera"
Post a Comment